LESSON 4: Apply Washes of Color to the Face:
Greetings, three weeks ago I posted Lesson 3 which dealt with correcting your image and applying a base coat of paint for the panel, St. Rose’s crown of roses, her face, religious clothing, etc. While repeating the last section of Lesson 3, allow me to make a few more comments to this entry.
Base Coat for the Lines of the Outer and Inner Religious Habit: Paint over the lines of both the inside and outside of St. Rose’s religious habit, using a mixture of pure black for the outside habit, and 95% Titanium White and 5% Carbon Black for the inner habit – you want to achieve a light gray color for the inner part of her habit (along the neck folds, see image below) – when you mix your paint don’t forget the Flow/Glazing Medium and the 2 drops of water.
** You can make the shadow/fold lines of the inside habit with this same light gray color, slightly broadening out the line to give the impression of the shadows in the folds (see the Brazilian scientists’ photo of the forensic anthropology recreation in an earlier lesson). After the grey folds have dried, apply light Titanium White washes of color over the entire neck garment, covering the folds so that they look natural in the garment itself (a wash is a diluted layer of paint). It will be a judgement call for you to know when to stop applying the Titanium White color washes. Attempt to make it a correct interpretation of folds in a white garment (thus, you don’t want the folds to appear very dark!). **
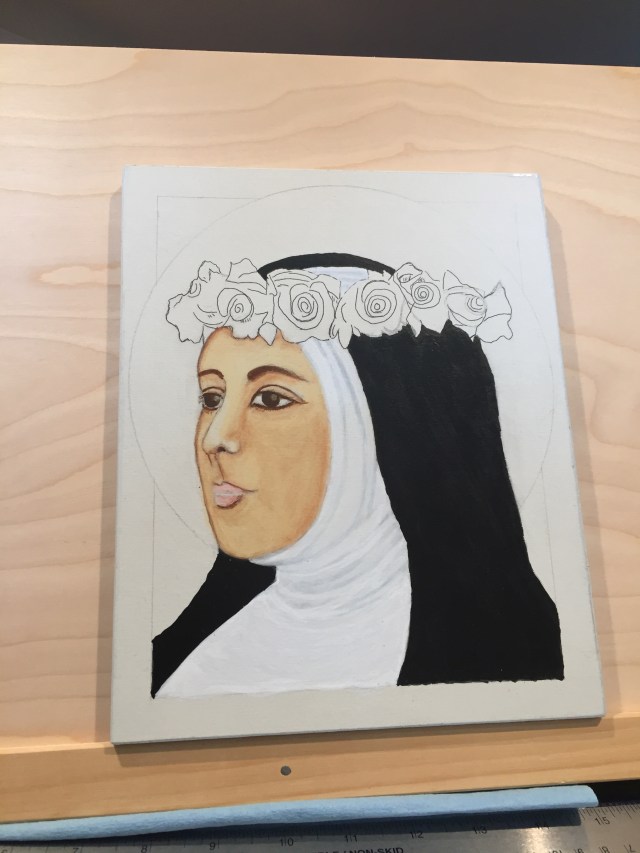
The photo below shows the step at which I first began to apply color. My intention was to mix a base coat color for the face that would provide a structure for the upcoming layers of paint.
I paint with thin paint. My intention is not to model the face so intensely that it provides an ultra realistic definition as in an oil or acrylic secular portrait painting. Of course, you can paint a heavily modeled sacred art portrait in oil or acrylic. If that is the effect you desire then go ahead and do it that way.
My approach is to Interpret NOT Depict.
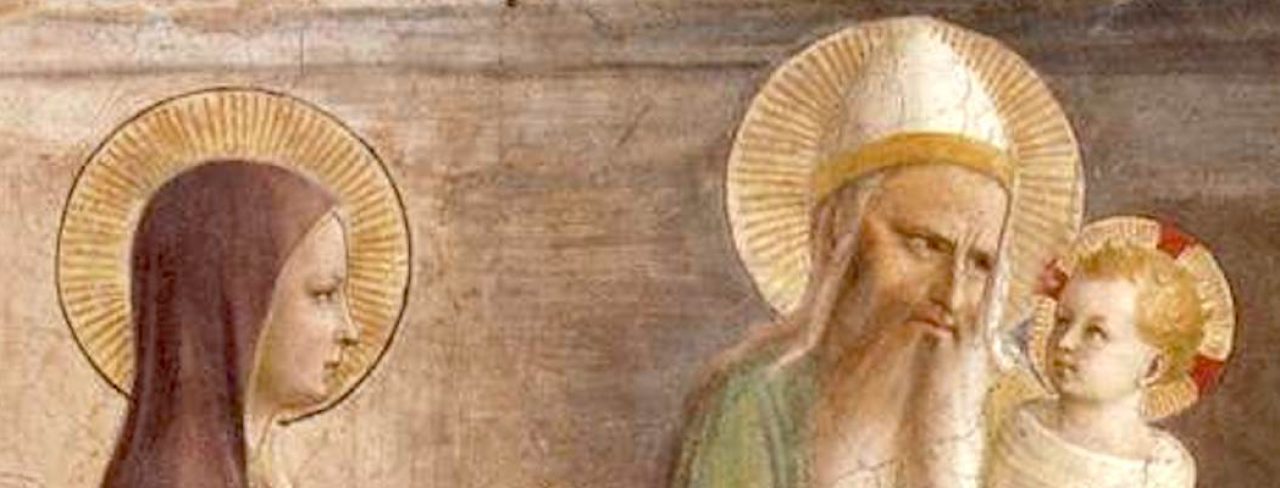
My approach is to present a flat, less defined, portrait in an attempt to interpret the saint or Scriptural event, not to depict it (as in photo realism) by creating a hyper realistic drawing (for the vast majority of saints we truly don’t know what they looked like).
The thought that an artist should “interpret vs. depict” is not original to me. James A. McNeill Whistler, one of the key artists of the 19th century “Aesthetic Movement,” originally said “the role of the artist is to interpret reality not depict it.” He actively promoted this idea among artists of his day.
My point is that you are not painting a representation of a living human being that takes the place of a photograph, rather, you are interpreting a deceased being in a spiritual, that is, a “divinized” state (based on their holiness).
Heaven must have some properties of allowing corporality (owing to the fact that Jesus Christ and His Blessed Mother were resurrected with physical bodies, yet, their bodies are unlike our own, with different properties, but bodies nonetheless). Saints, when we artistically interpret them, have not been reunited with their physical bodies, (this will occur for all of us at the Last Judgement). So, I am attempting to show that reality through this method. They are in an very exalted, but different, state of being.

The next set of photos shows the application of a thin layer of base coat for the face, then I darken the face, and finish with final layers of a lighter wash and blush.
Thin acrylic paint dries quickly. If you get impatient during the steps below, or it is a humid day, you can use a hair dryer for a few seconds only and on a cool setting. Don’t place the nozzle close to the paint! Place it 12 inches (about 30 cm) away from the board, for a few seconds (about five!) in two or three increments of drying. Don’t “cook” the paint – it will crackle!
In last month’s Lesson 3, I said the following for the Face Base Layer:
Base Coat for the Entire Face: mix 2 parts (2 pea size dollops) Warm White with one part (one pea) of Yellow Ochre, add your Flow Medium and in this case, 7 drops of water. Remember, to continually shake the Flow or Glazing Medium before you add it. Mix well!
APPLY THIN LAYERS OF PAINT! Apply one thin layer over the face, let dry. Apply two more thin layers over the face of this paint mixture (not on the inside (white) of the eyes). Again, it is a dry brush technique. NO SLOPPY PAINT LAYERS.
Base Coat for the Lines of the Face: When the face is completely dry, go ahead and take your # 00 or # 2 round brush and paint over the lines of the face with Red Earth (Red Oxide) with a little Carbon Black. Add the head-of-a-pin size amount of black.
Washes of New Colors For the Face:
If you are an experienced painter and have played with color feel free to use the pigments that you like for the base coat, and/or washes over the face, but remember, thin layers, and no extensive photo realistic modeling.
Now that you have the Warm White/Yellow Ochre base coat layer on, you can begin to apply your color washes to the face to begin to model some definition. You need to have thin washes of paint.
A wash is a diluted layer of paint. After I obtain a color mixture that I like I use a small amount of water (a very saturated brush, or 7 medicine dropper drops of water) combined with 3 drops of Flow Medium or Glazing Medium in order to provide adhesion to the pigment mix and obtain a very thin layer of paint.
For Middle and Southern American, southern Mediterranean and Middle Eastern saints the mixture of paint wash for the face that I have successfully used in the past is Gold Oxide (1 pea size dollop of paint) plus Titanium White (2 pea size dollop) plus Carbon Black ( very, very small amounts added in increments, be careful with black, a little spec (pin head) size at a time until you obtain the color you want). Remember, to continually shake the Flow or Glazing Medium before you add it. In the photo below NOTICE that I left areas untouched by the darker facial wash.
MAKE SURE YOU ALLOW THE FACIAL LAYER OF PAINT TO DRY BEFORE YOU APPLY A SECOND, THIRD, ETC. LAYER. THIS IS TRUE FOR WATERCOLOR PAINT AND EGG TEMPERA PAINT, TOO.
If you own the pigment Raw Umber you could use this pigment mixed with Titanium White in diluted washes for the face, too.
I repeat, in the photo below NOTICE that I left areas untouched by the darker facial wash.
Mix thoroughly on your plastic palette, or in plastic cup, or grey palette paper, and then test the paint on a piece of white paper to make sure you like the color. If you like it then begin to apply it, in very thin layers, to the face. Remember, not on the inside of the eyes. If you don’t like the color then experiment with different amounts of each suggested color to obtain a shade that you prefer. Remember this step is to provide a foundation for your very last layer of color.
I repeat one more time (!), in the photos NOTICE that I left areas untouched by the darker facial wash.
Hmm, I’m into repetition today (because its very important): MAKE SURE YOU ALLOW THE FACIAL LAYER OF PAINT TO DRY BEFORE YOU APPLY A SECOND, THIRD, ETC. LAYER. THIS IS TRUE FOR WATERCOLOR PAINT AND EGG TEMPERA PAINT, TOO.
Remember, use thin layers of paint to build up the color. Stop when you like the affect. Don’t overdo it!
After you have finished this step – wait a few days. Let the layers of paint below the top micro layer, thoroughly dry.
FINAL WASH of Color for the Face:
After you are satisfied with the look of the face, apply a very thin wash of Yellow Oxide (3 pea size dollops) with Titanium White (1 pea size dollop of paint). Add 3 drops of water and 3 drops of Flow or Glazing Medium, mix well. Remember, to continually shake the Flow or Glazing Medium before you add it. Read the asterisked paragraphs just below this one, now.
*** After applying this step, I used the Maxine Mop brush to shape the face while each layer of applied Yellow Oxide/Titanium White was still drying. I use the brush with the bristles facing straight down, and dab it, its not like a typical brush where the bristles are either flat or at a 45 degree angle. Don’t let the bristles accumulate with paint – wipe them off on a dry paper towel ever two or three dabs. Work quickly because acrylic paint dries rapidly. ***
**** You should NEVER dip the Maxine Mop brush into water when you are using it – it will ruin its effectiveness as a blending brush. ****
***** You are NOT loading the Maxine Mop with paint. *****
****** You are using the Maxine Mop brush as a make-up artist would use it (some supposedly do), to lightly touch the paint, blending color. After you use the Maxine Mop dry it on a paper towel. You only dip the goat hairs into water to clean them when you are completely finished painting for the day. You can add a small amount of liquid soap to the palm of your hand to gently wash the bristles of your brushes. Let them air dry, with the bristles in the air, not facing down into a cup. Never leave any of your brushes in water, it will ruin them. ******
I applied three layers of the Yellow Oxide/Titanium White color mix. This application depends on your base layer. So you have to make a judgement call on when you are finished with this layer. It is always better to put less on than more. You don’t want to have her look like the proverbial 19th century circus lady. Don’t rush this step; its not a sprint, its a marathon.

I wasn’t completely happy with the result for her face. I could have done a better job in blending the rouge of her cheeks to provide less mottling and a little more structure without overdoing it. Well, always plan to do better next time. To paraphrase St. Paul – “After you stumble and fall short, just get up and start again.”
Apply Color Behind the Saint in the Area that is Called “Heavenly Light:”
The above photo shows the application of Naples Yellow (1 pea) plus Titanium White (7 peas) in a thin wash to the area behind St. Rose, known as “the Heavenly light.” Play with the pigments prior to putting them on the panel. You have to find a shade of color that you think works. Remember, to continually shake the Flow or Glazing Medium before you add it. I can’t repeat it enough: always apply the paint in a thin layer, wait for it to dry, and then apply a second layer. You should not need more than two or three layers of paint for this section of the board. A light, not dynamic, color of paint for this background works well.
Please remember that thin acrylic paint dries quickly. If you get impatient or it is a humid day, you can use a hair dryer for a few seconds only and on a cool setting.
Apply Color to the Lips and Cheeks:
The pink blushes on the lips and cheeks may be obtained by using very small amount (head of a pin) of Cadmium Red Medium Hue or Alizarin Crimson that is toned down with Titanium White until you obtain a pink shade that you like. Always remember to mix in water and Flow or Glazing Medium, too.
Mix a pink that you like and is appropriate. You do not want to present a heavily rouged, lipsticked, or blushing saint (again, no circus lady!). You need to have color but it needs to be understated; again, play with the colors, and remember, were are interpreting not depicting a person in an alternate state of being. You can highlight the lips with a little Cadmium Red or Alizarin Crimson mixed into a few drops of water, and Flow or Glazing Medium. While the paint is still wet, use a dry Maxine Mop to blend the pink into her cheeks.
Apply Color to the Eyebrows, Eyelashes, Iris, Pupil, and White of the Eye:
Simply, Carbon Black with a small amount of Red Earth for Eyebrows and Lashes. Carbon Black with a little spec of Titanium White and Red Earth for Iris, or use a Raw Umber brown if you have it. Carbon Black for the pupil of the eye. Mix a very, very, very light grey for the whites of the eyes.
St. Rose of Lima was considered to be quite a beautiful woman, however, as a religious she changed her outward appearance through heavy, and very dangerous, fasting and physical labors. She said that she did not want to be considered beautiful by the men of Lima. You can see her original beauty in the Brazilian forensic team’s physical reconstruction of her features from her disinterred skeleton in the photo of previous lessons.
We will finish up this sacred image of St. Rose of Lima with Lesson 5. It will deal with the painting of the roses and leaves on her rose crown, the outer Red Oxide frame border, and the gold interior of her halo. Talk to you in a few weeks.
June 16, 2018
Photos and text © Deacon Paul O. Iacono 2011-2018


You must be logged in to post a comment.